
Do you want your jewellery making to look more professional but not have to be a perfectionist? Recently I brought myself a bead looper, something I've been wanting for a long time but never had the money to buy one.

If you'd like to buy one of these, I got mine from Amazon which worked out cheaper then anywhere else.
I recommend getting of these, I've used mine loads since purchasing it and it has more then paid for it's self.
To recommend this post to a friend you can use the social media links below or the envelope to email a friend.
A bead looper is used to make the loop above a bead. The bead looper I choose to buy was the Vintaj 1 step looper I think it has been money well spent because when I make a necklace which has a lot of beads in the form of a chain, it saves so much time to be able to use the bead looper instead of doing all the loops myself. Something else I like is how professional the pieces I make look now that all the loops are a uniform size.

One thing I don't like about my new bead looper is you can't adjust the size of the loop, personally I find the loops are a bit to small for me to be able to use the tool for all my projects. Sometimes I just need a bigger loop so I have to go back to doing it myself. If they make a bead looper mark two, I'd recommend they add a feature which enables you to change the sizes.
This is how it works...
Step one put a bead either on to a head pin or eye pin.

Step two thread the end of the wire through until it goes through the hole and the bead is next to the lower jaw.
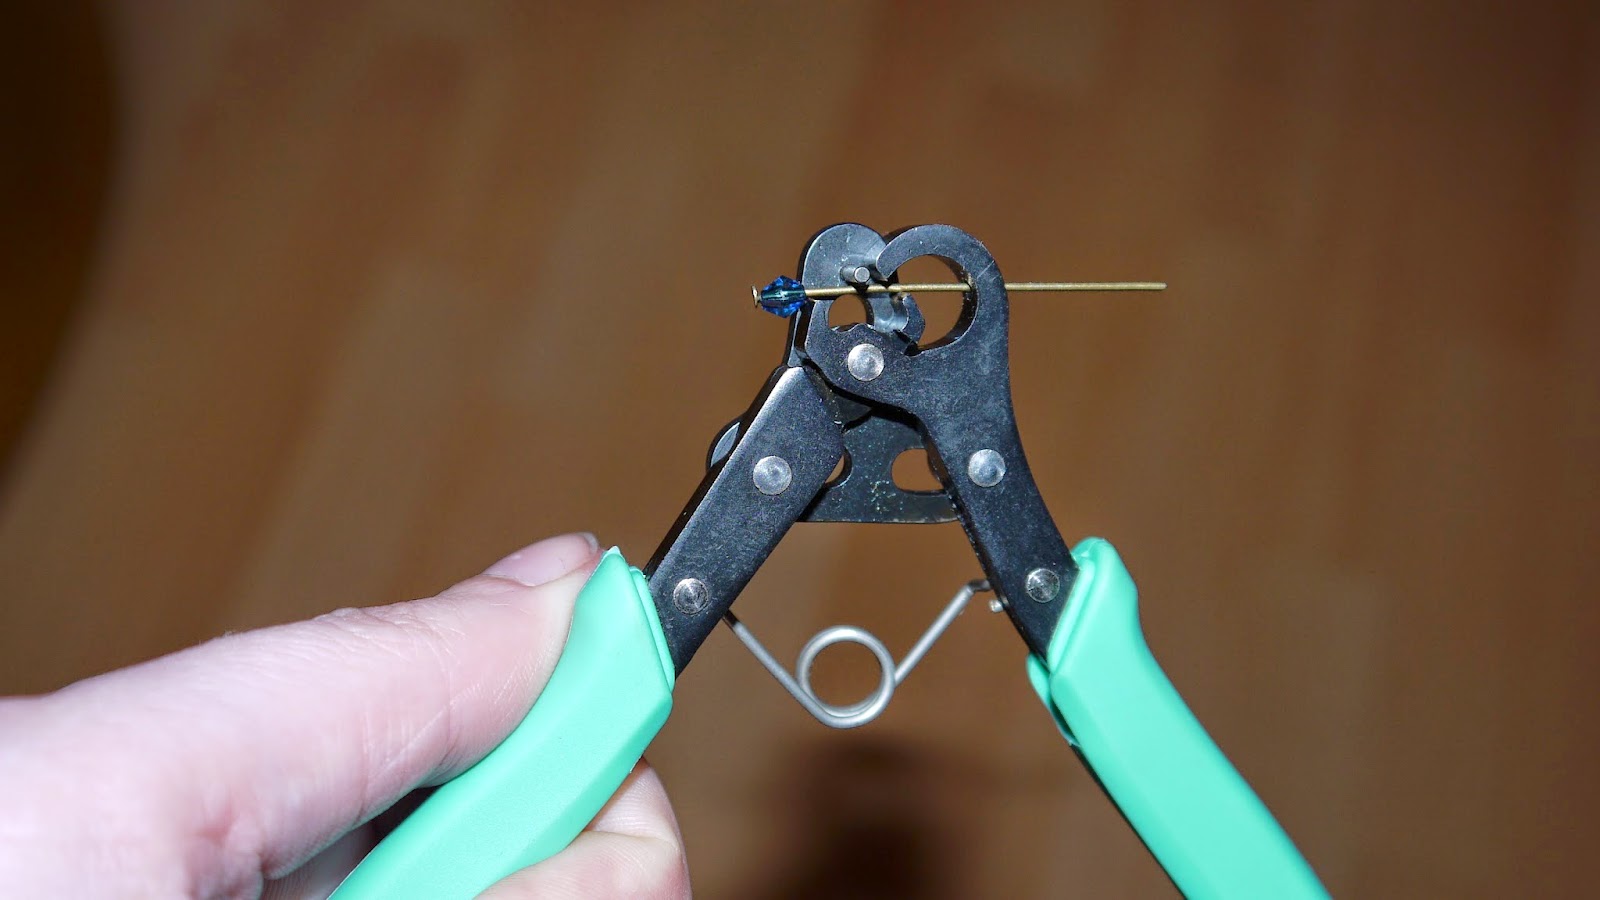
step three Squeeze the handle and the looper will turn the wire, cutting off the excess and turning the rest into a loop. With this step I find its better if you keep a hold of the bead while the tool does its thing.

Step four with the looper still squeezed bend the bead up so that the loop is straight.
Step five pull your newly looped bead free and do with it what you want. You may find some times the loop needs a gentle press to close.
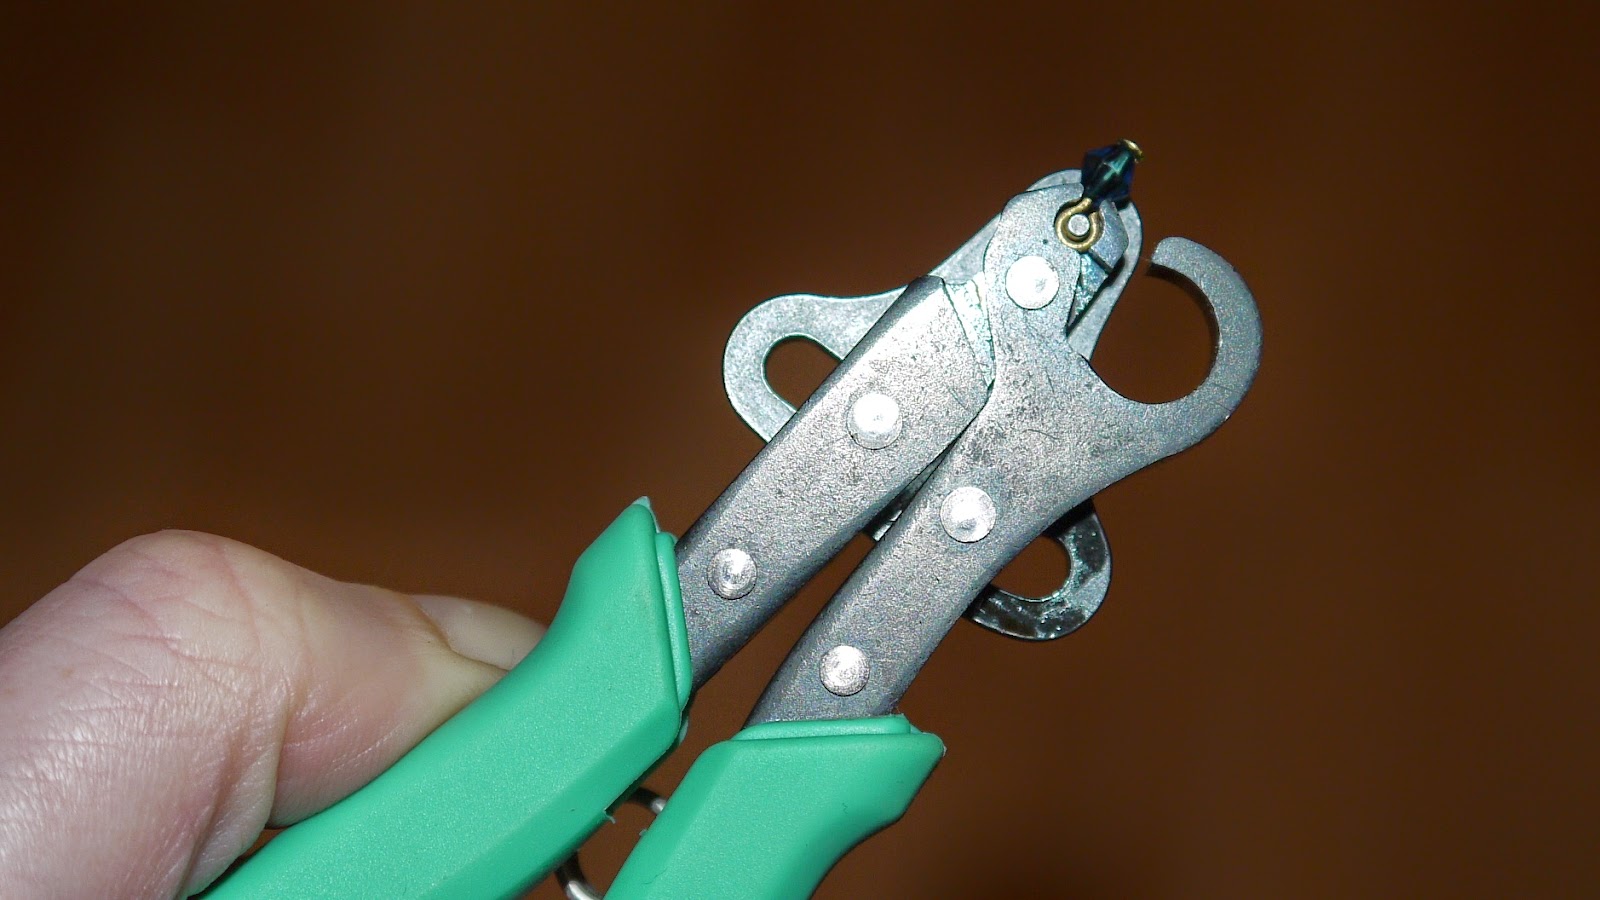
This is how it works...
Step one put a bead either on to a head pin or eye pin.
Step two thread the end of the wire through until it goes through the hole and the bead is next to the lower jaw.
step three Squeeze the handle and the looper will turn the wire, cutting off the excess and turning the rest into a loop. With this step I find its better if you keep a hold of the bead while the tool does its thing.
Step four with the looper still squeezed bend the bead up so that the loop is straight.
Step five pull your newly looped bead free and do with it what you want. You may find some times the loop needs a gentle press to close.
If you'd like to buy one of these, I got mine from Amazon which worked out cheaper then anywhere else.
I recommend getting of these, I've used mine loads since purchasing it and it has more then paid for it's self.
To recommend this post to a friend you can use the social media links below or the envelope to email a friend.
No comments:
Post a Comment