Adsense

Tuesday, 20 November 2012

Pom pom bracelet

I've got a confession to make. I'm addicted to pinterest at the moment.
It's on pinterest one day I came across a design for a pom pom bracelet. It's a really fun and simple tutorial so I thought I'd give it a go and share my results with you.

For this you will some yarn, a fork, scissors, 4 jumprings, a clasp, 2 lengths of chain and a needle.

First wrap the yarn round and round the fork until you get a thickness you like.

Now wrap the yarn the yarn the other way round and fasten in a knot.

Next cut the pom pom from the the fork.
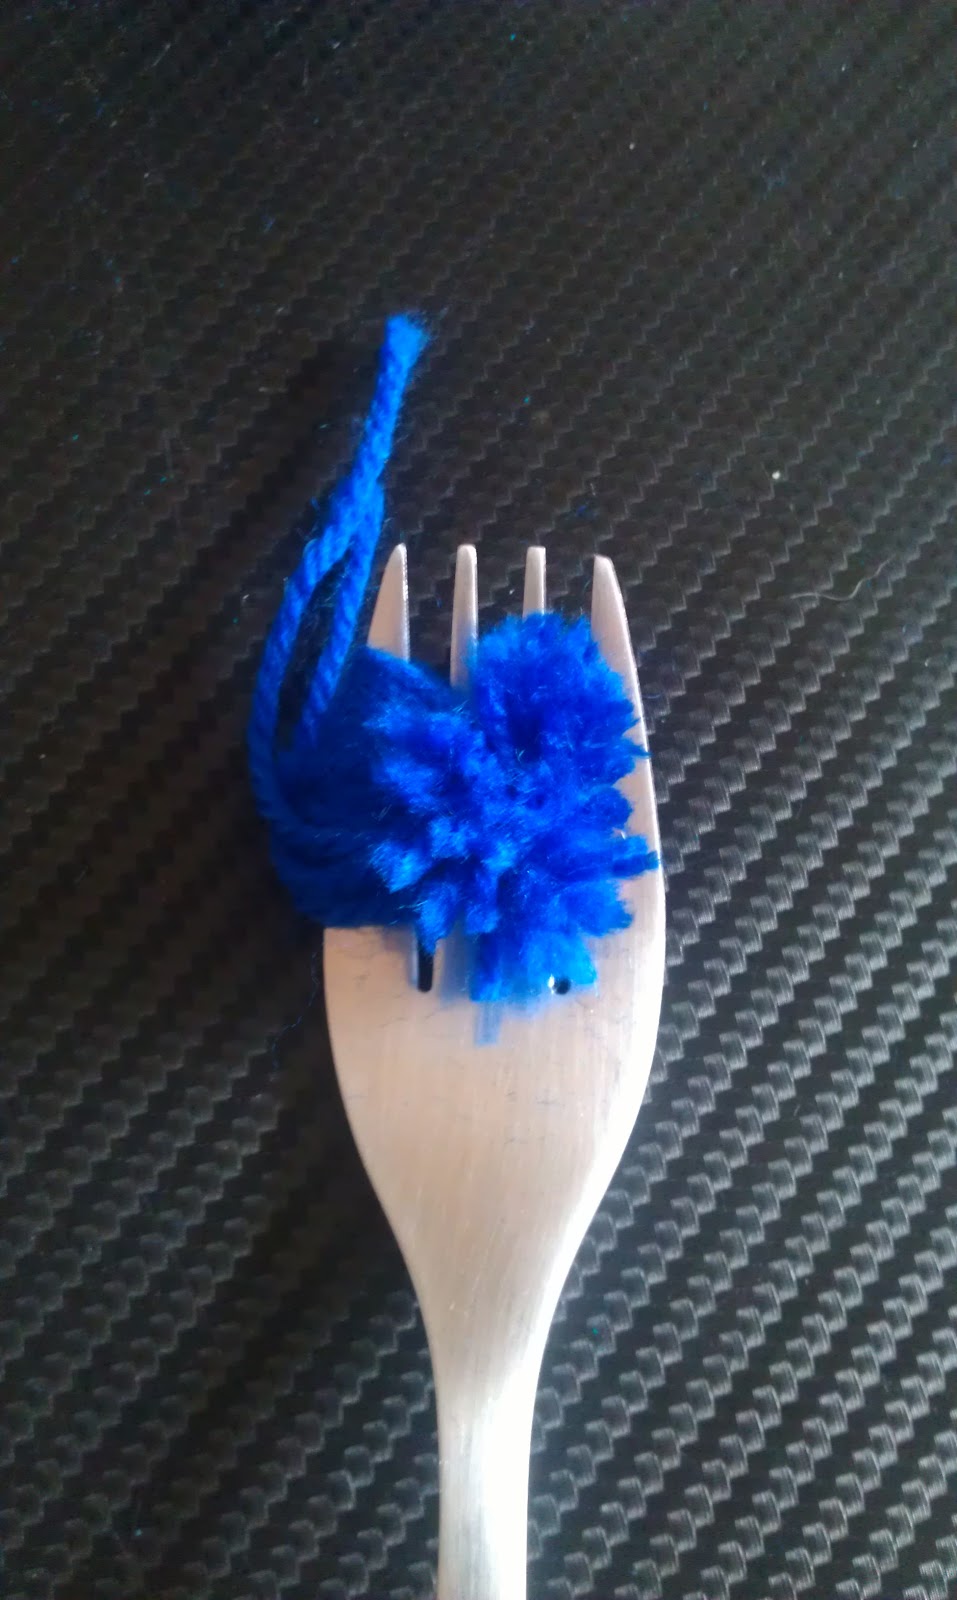
Neaten it up in to a perfect round pom pom and repeat 2 more times.

Now that we have 3 pom poms use a length of the yarn and thread it on a needle. Push the needle throught the centre of the pom poms and then back again make sure you leave a loop at the end pom pom, you'll be need ing in it soon. ( Make sure you leave a small gap between each pom on the yarn)
Tie the 2 ends of yarn to make the other loop.

Attach jump rings to the loops, and attach the chains to them. Finish with your fastenings and there you have it your very own pom pom bracelet!

Next time i'll show you how to make a ombre bracelet with seed beads. Until then thank you for reading Fashion Magpie Jewellery's blog

Tuesday, 25 September 2012

Inspired by Autumn

The weathers been foul lately but at the same time i do quite enjoy autumn (mostly anyway!)
The leaves are beginning to change into all thoughs wonderful hues of red and orange and its getting colder so where collecting logs to burn on the fire. It's this image of Autumn i've chosen for my inspiration in two new pieces ive created.
The first is a pair of earrings i'd like some feedback on, i'll explain why soon. I've called them the honey flower earrings due to the colour of the bead in the middle. When worn they make a pleasing ring. They where made by opening up a 8mm filigree bead to make the petals and threading the bead and filigree on a head pin, and secured by wrapping the excess head pin around the loop of a ear wire.
Now back to needing feedback, as i said ive named them the honey flower earrings but ive had people say they look like lampshades with a bulb glowing in the middle. What do you think? Flower or lamp shade?
My second item is a necklace ive made called Gold Swirl necklace. I made this with the colours of the leaves turning in autumn in mind. I really quite like the results, see what you think.
It's a two strand necklace made on tigerwire with various autumnal tones on one strand and orange seedbeads on the other and tied together in a calotte. To cover the calottes i wrapped them in a bronze filigree cone. The focal pendant is a lentil bead wrapped with the same bronze filigree i used with the earrings above. Lentil beads are a new find for me, i think there beautiful and look forward to using them more in the future.


 Sorry the second picture isnt that good, i took several pictures of it and none where very good.

Next time i'm hoping to have some more necklaces to show you im currently working on. Also i'm working on a tutorial for making either a pair of earrings or one of the necklaces. Until then take care and thank you for reading the latest Fashion Magpie Jewellery blog post.

Monday, 3 September 2012

New Items For Sale

Hi

Got some great new things to show you i've made and are now for sale at Fashion Magpie Jewellery.

The first is a cluster ring
£4.50


£8.99


Lastly, i have a the Lily Green Necklace and Earrings set. Ive been working on this project for a while and i'm quite proud of the results. See what you think below.
£23

Hope you like what you see, and if you'd like to know how any of the three are made just ask.
To buy any of these or others simply go to www.folksy.com/shops/fashionmagpiejewellery

Monday, 13 August 2012

The basics in earring making

I've been busy lately moving house so I apologize for the gap in posts.
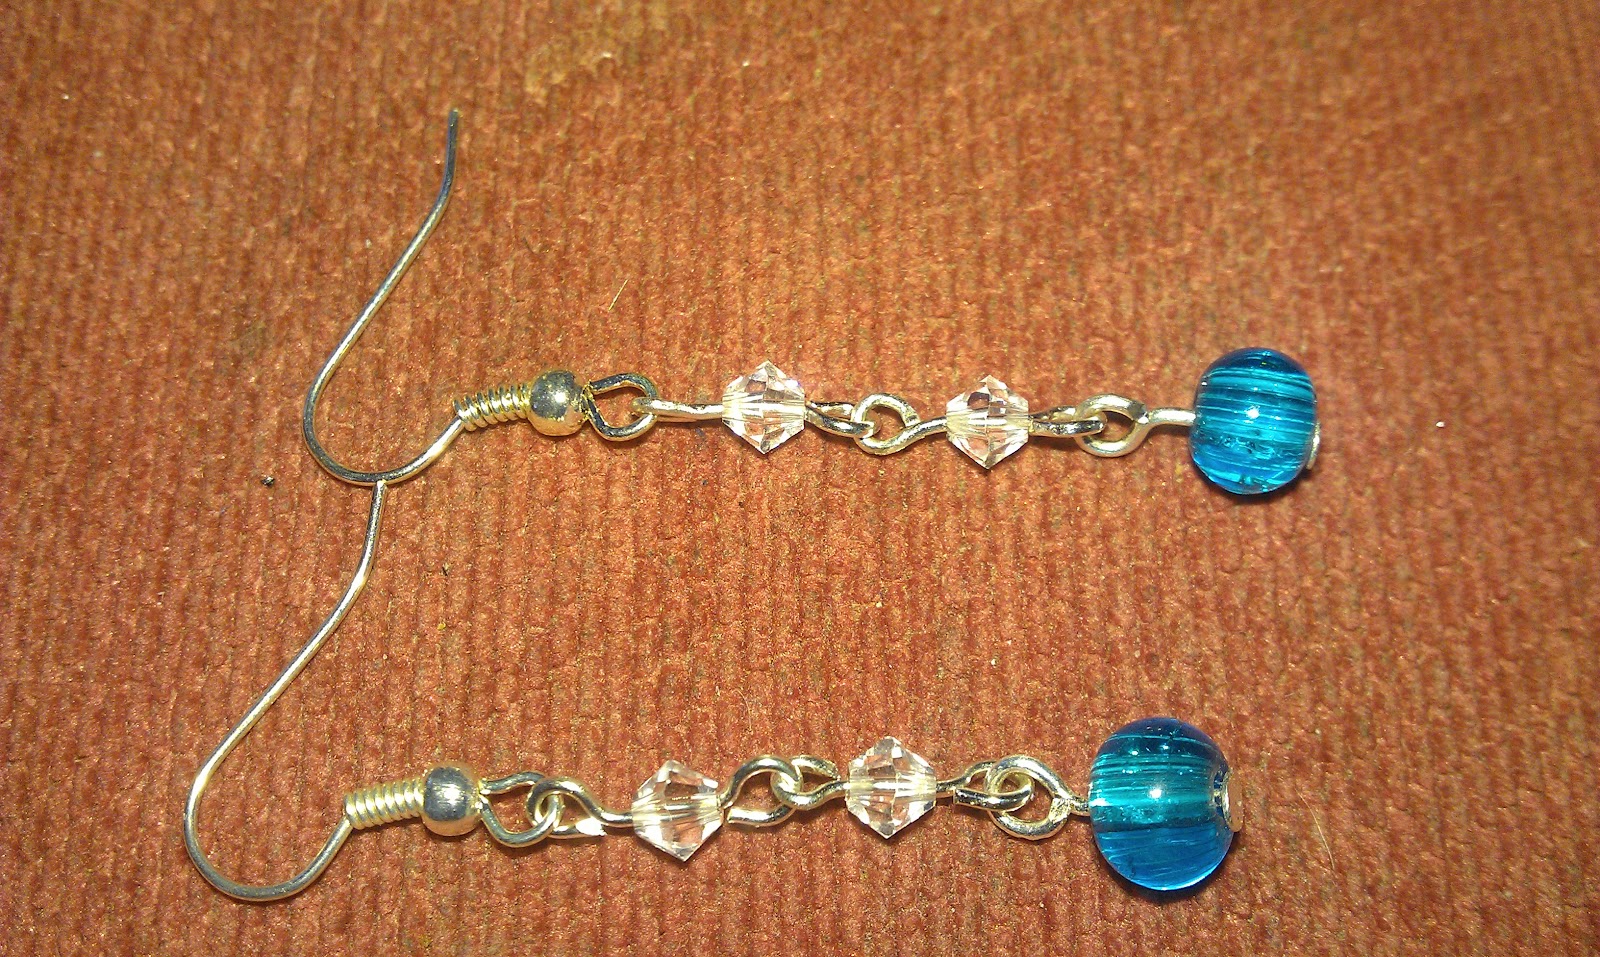
Anyway in this blog I thought I'd show how to make some basic earrings, shown below. If your just starting out these earrings are a great way to practice making hoops.

For this choose 6 beads, that's 3 for each earring. 2 headpins, 4 eye pins and 2 ear hooks.
First thread the botom bead, in this case the blue crackle glass bead on to a head pin
Next bead the wire 90 degrees to the bead then double back on yourself to make a hoop, cut of any excess wire or alternatively round it around the base of the hoop. Now do this again with the other bottom bead. for a picture diagram of this technique check out my Blog on Creating a Steampunk brooch and keyring

Now open the end of the eye pin just enough to put the hoop of your bottom bead in then close and thread your next bead on the eye pin. Do this again with the next bead.
Once all beads are looped together its time to had the final part. Take the ear wire and open the hoop enough to hang your earring on, now close it and you have finished earrings.


Thursday, 14 June 2012

Recomended for jewellery makers

I recently came across 2 books which id like to recommend to you. Both are by a company called Vintaj, there both very similar books but have great ideas in, which I'm sure I'm going to use in my Fashion Magpie Jewellery designs from now on.
The first of the two is called mixed metals. This book teaches you the techniques for patinas, image transfers, etchings, embossing, distressing, riveting, hammering, melt art and more. The book is easy to use with straight forward guides step by step. One technique i really want to use is the image transferring on to metal, I've just added Commission Designs to my website and i think this technique would be great to use.
The second of the books is called Vintaj jewelry. This books shows you the basic techniques for stamping, using ink, dap, imprint, texture and riveting blanks.This is a great book if you just want to know what Vintaj design is all about.
After reading through the books i found they have a website also with even more beautiful and inspiring designs to make. Click Here for website.

Heres some designs i love the most, click on the titles to be taken to the design.

Click here to restore original picture.
Guarded heart

Click here to restore original picture.
Surf and turf

Click here to restore original picture.
Alive at sunset

Thursday, 31 May 2012

Handy tip for jewellery making

Jewellery making isn't a expensive hobby, and theres ways to keep the costs down even more too, after all keeping the pennies to a minium is a must in this ecomomic climate.
Tip number 1 is to make your own jumprings. I do this by keeping all the off cuts when i make earrings, i then curl the little off cuts round, round nose pliers to make a circle of the size i want.
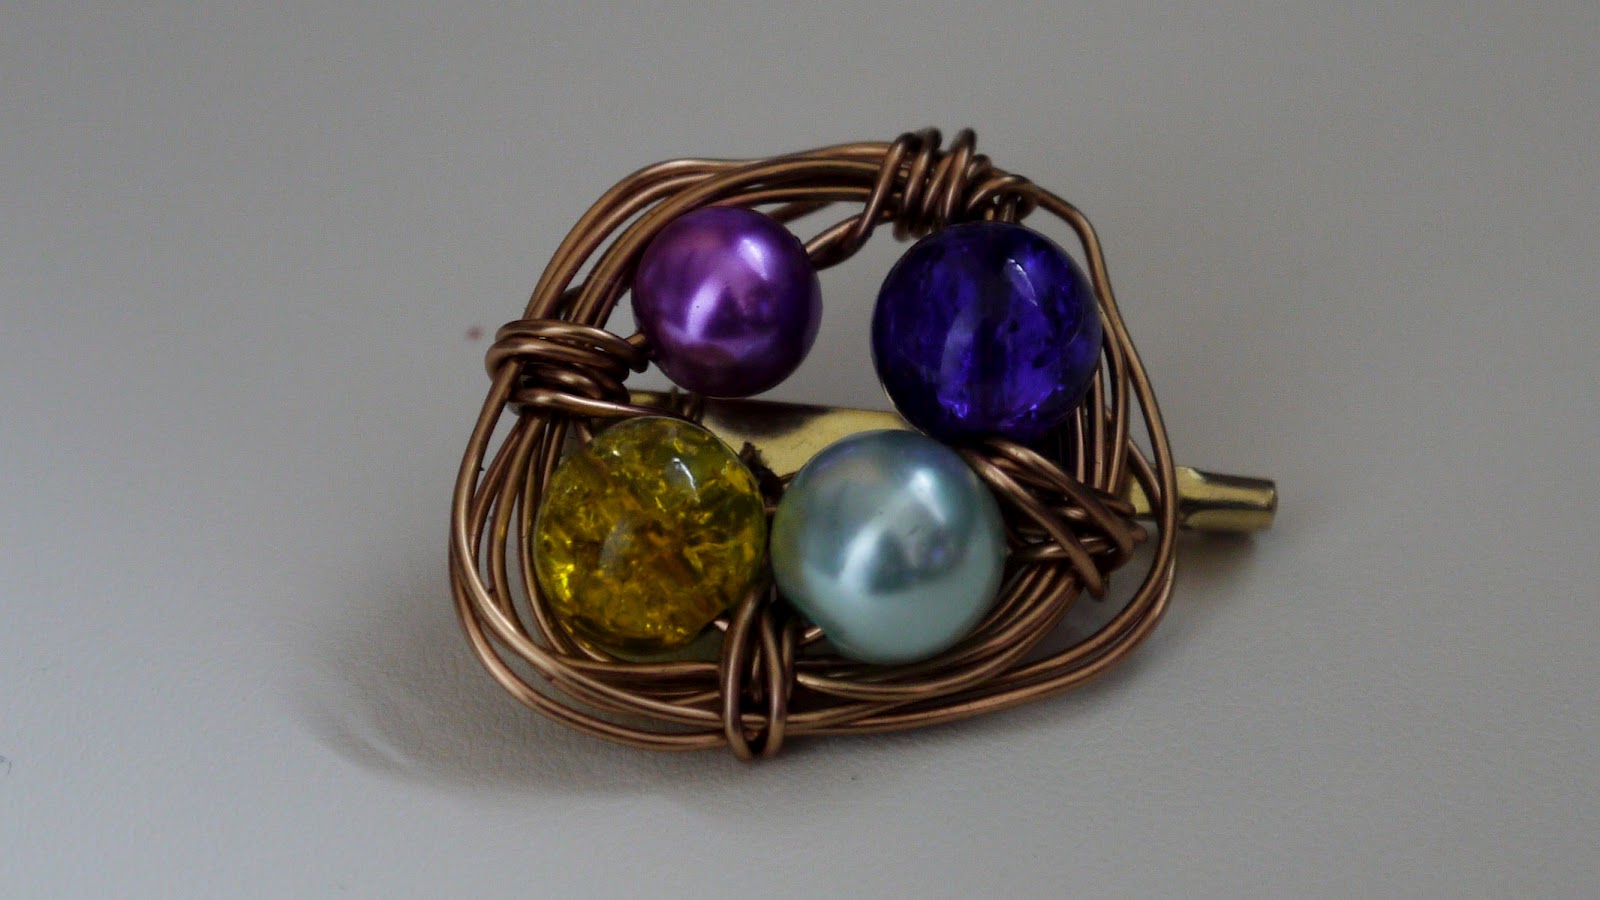
Tip number 2 is make brooches out of left over beads. The first 2 brooches i have here are made from copper welding wire then the beads are strung on to 20 gauge wire and arranged to my liking. The 3rd of the designs is known as a birds nest, this is made with 20 gauge wire. 3 or 4 beads are threaded on the wire and the end turned over, the wire is then wrapped round and round the beads until you have a density you like then its wound 3 times between each bead to keep it all in place. I love this design for its simplicity and beauty.


The 3rd tip i have is to dismantle old necklaces you no longer wear, or to browse through your local charity shop for cheap beaded necklaces. My baby sister has a habit of snapping my necklaces and sending the beads everywhere, so this has been a helpful tip for me over the years.
In my last posts i talked about making a steampunk brooch and keyring, and What is Steampunk, these designs where both made from items i no longer used.

So there you have it 3 quick and easy tips for keeping the costs down when jewellery making!

Friday, 18 May 2012

Creating a Steampunk Brooch and keyring

As promised in my last post What is steampunk?  I have created two pieces of jewellery in the steampunk style.
The first is a brooch, which at first started out as a pendant but during making it i decided it might just be better off as a brooch!
I used a Abalone pendant, a tiny butterfly charm, a old watch face, a cog charm, a bolt and 2 clear cabochons that reminded me of a mystics glass ball.
This a fairly simple design.
It basically just involves arranging the pieces in a arrangement you like then gluing it all in place.


All there you have it the basics of a brooch, next is just to attach the brooch back and its finished.

The second design is the key keyring, this one is a little more difficult. To make this i used a old watch keyring which i dismantled, a key charm, beads, jump rings and keyring.
First i dismantled the watch in the key, (the clock face is the one used in the brooch) the space where the battery sat i filled with diamante. I also used diamante to cover the information and add a bit of detail. The glue i used is G-S Hypo Cement which has a precision applicator, which just makes things easier

The next step was to make the chain it all hangs from. This is made of jump rings which i strung together and added the charm and beads to. For the pearl, here's a quick run down in pictures of how to make it.

 Lastly the keyring was attached to the top jump ring.

This was a bit of a rush through of how i made the two items, please ask any questions.

To buy the brooch click here
To buy the keyring click here